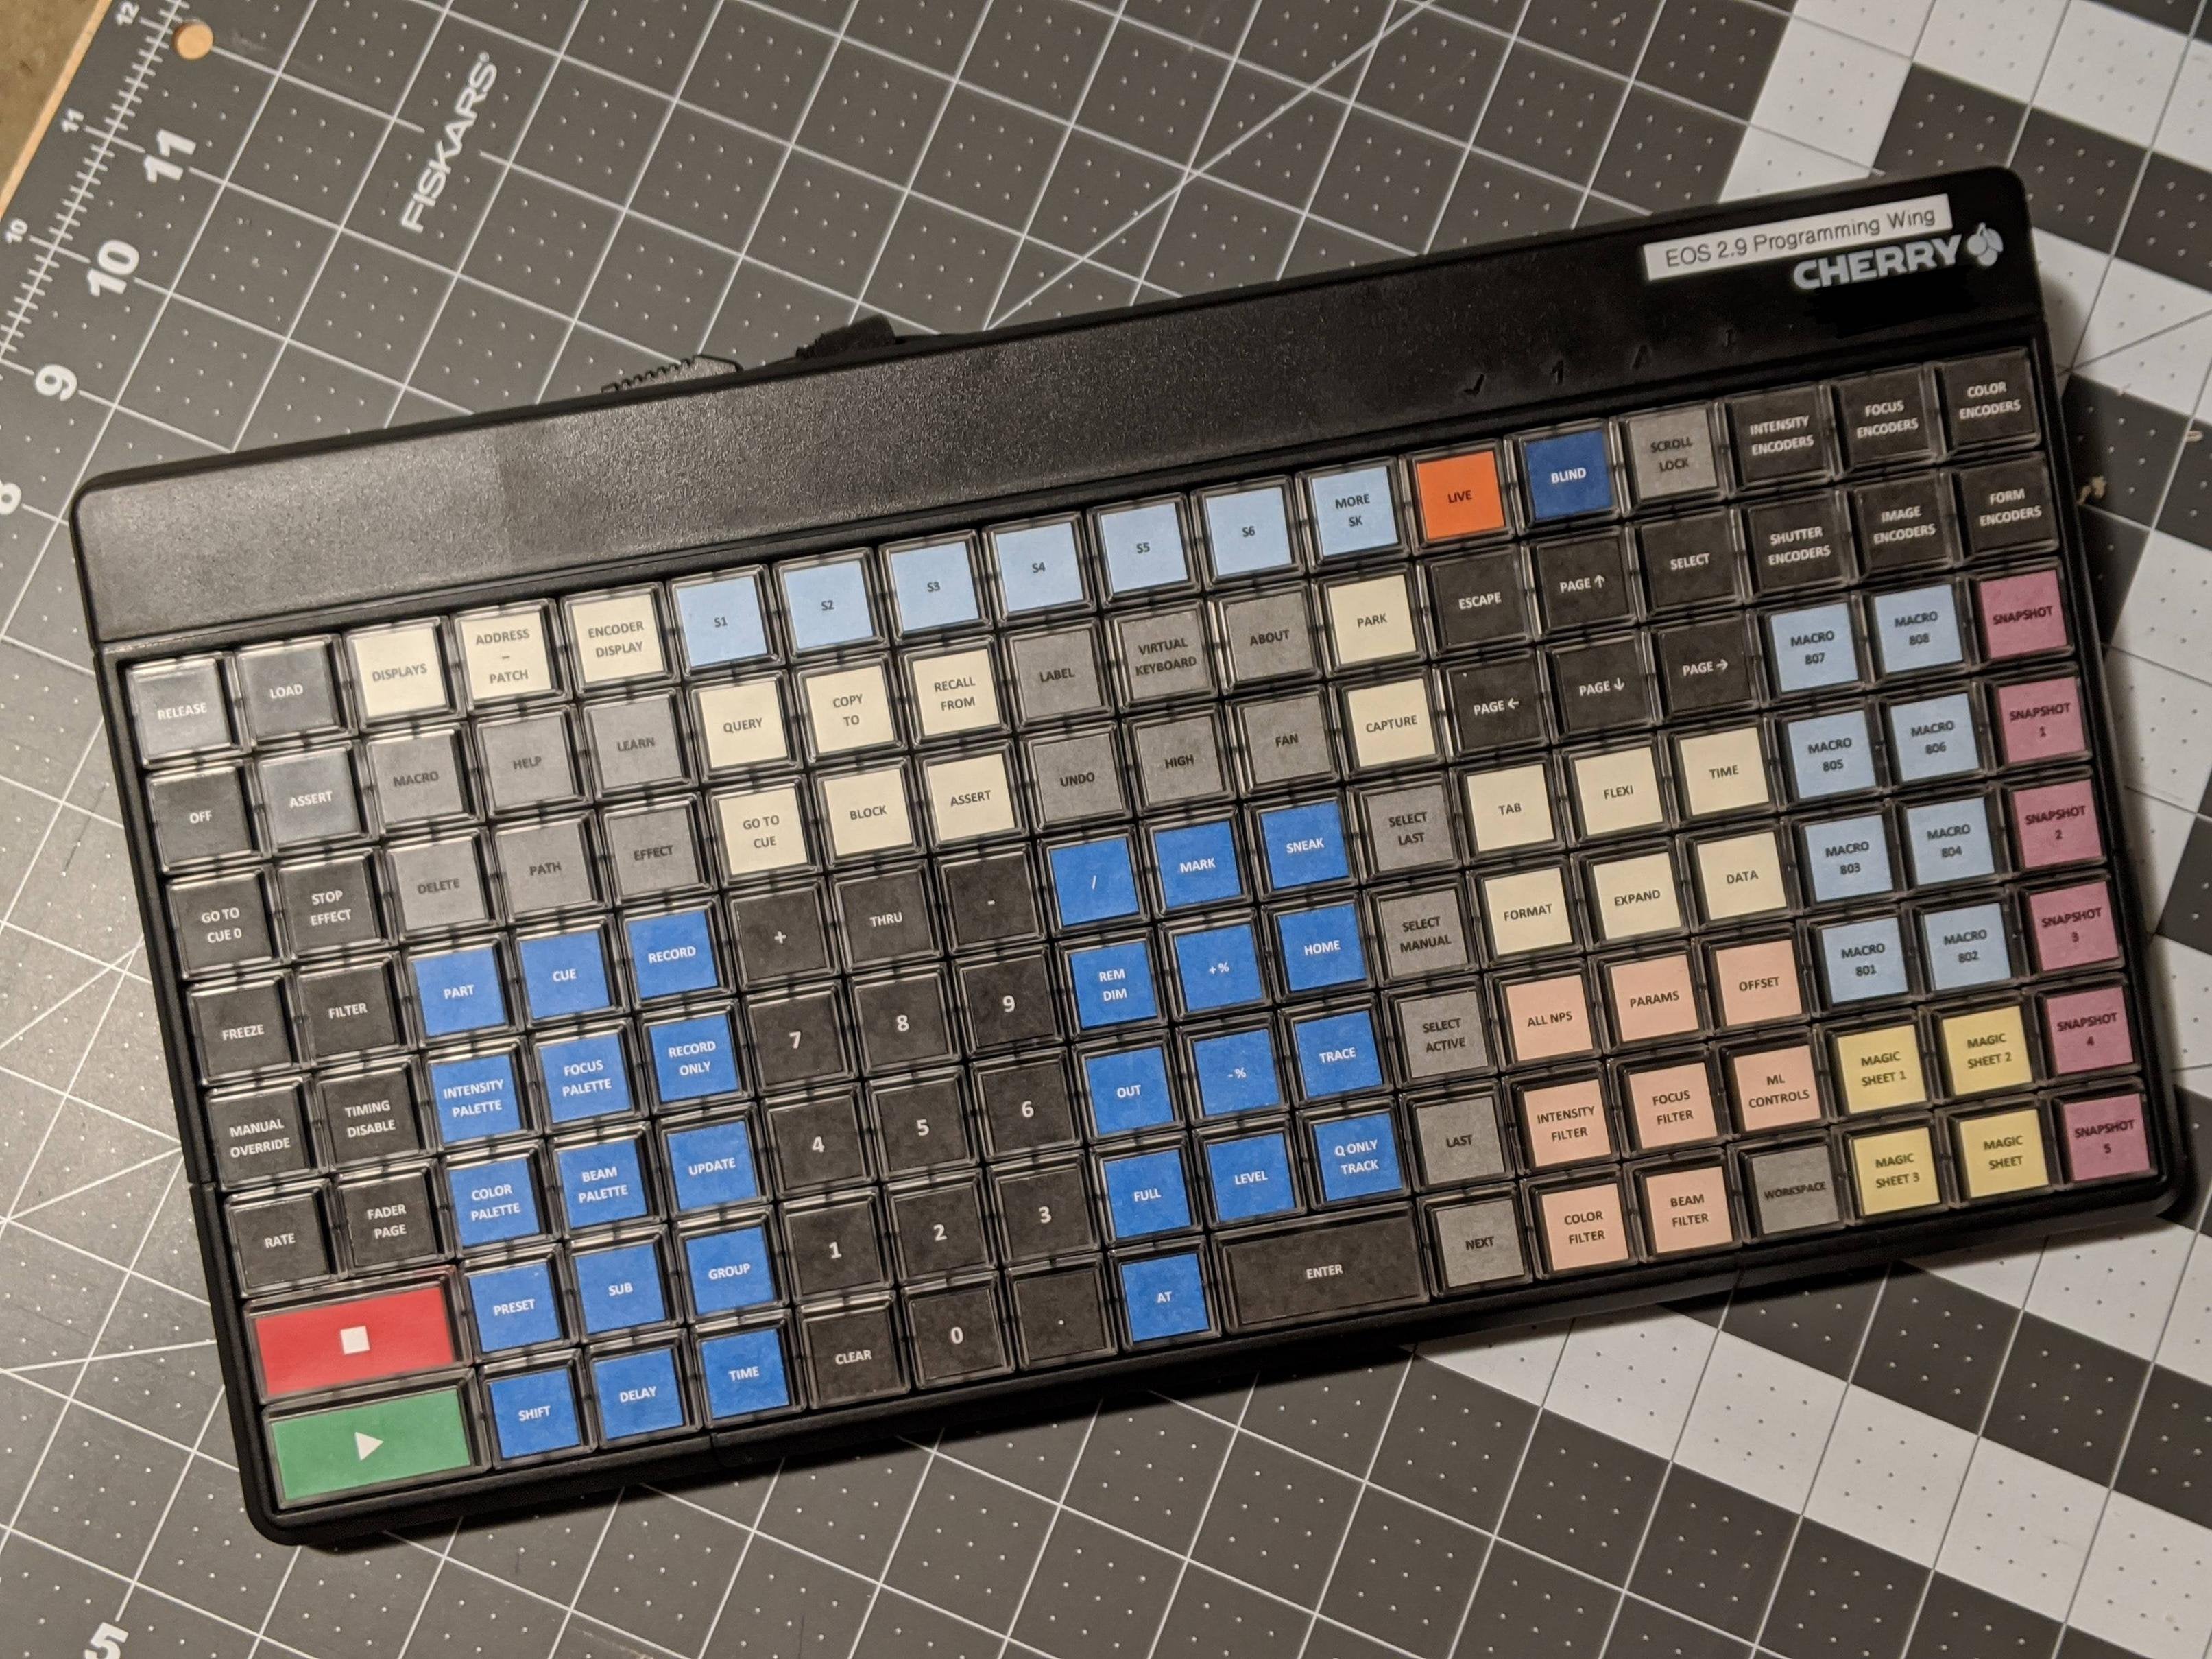
This is to serve as a quick guide to make your own EOS programming keyboard like mine. I will happily answer any questions or help as much as I can. Feel free to email me if you need additional information.
The first think you will need is the keyboard. I used the Cherry SPOS G86-63400. I will also include the files to make a slightly modified version using a Cherry SPOS G86-63401. This model has a (not-so-great) touchpad instead of the lower-right 12 keys.
The biggest hurdle with using these particular keyboards is that the both come with TWO two-high by one-wide buttons that can only be used in that same tall configuration. I wanted to have THREE one-high by two-wide buttons for "GO", "Stop/Back", and "Enter". You are able to use the horizontal "lens"/key cover across two individual smaller squares, but that doesn't leave you with enough keys to do the layout. I searched Ebay and found the cheapest Cherry SPOS keyboard I could find (type didn't matter, as long as it has at least one double-wide "lens" and four more square buttons to fill the holes left by the two tall keys.) I found one for $15 and free shipping. I then had enough square keys and lenses to do the entire layout.
The harware was the only thing that cost me money. Everything else was time. (Although if you don't have access to a large-format color printer that prints 11"x17" paper, a quick trip to a FedEx/UPS/Office Depot and a few dollars can fix that.)
The next step was the design. The square keys are 0.55" x 0.55" printable area and the rectangles are 0.55" x 1.3". I tried my best to go with a standard layout, filling in empty spaces with my most frequently used keys. I also had to keep in mind that not every function I typically use has a hotkey in Nomad. I used Microsoft Publisher for my layouts. I have included a layout for both models below in both .PDF and .PUB formats.
After the design was printed came the cutting. I spent about 2 hours with a cutting mat, hobby knife, and a straight edge to get all 142 squares cut out. (Definitely print at least two copies of the layout. I had a couple mishaps on the first sheet). The labels are fairly easy to install. You lay them on the key, then gently snap the "lenses" on top to hold the paper inside. Sometimes they sneak out or get pulled by static. Luckily the keyboard came with a special keycap puller to pull them back off.
The final step is programming all of the hotkeys. You will need the "Cherry Tools" software, available on Cherry's website. None of the documentation EOS has is 100% complete. You have to use trial-and-error with a combination of the HotKeys list for EOS 2.9 and the shortcuts displayed on the virtual keyboard in Nomad (every key has a shortcut, such as "W", "cB", or "caL", where lowercase c and a are "Ctrl" and "Alt"). I have included the configuration files below to save you some time, but you'll need the source materials if you plan to change your layout.
The Cherry Tools software was pretty intuitive, but the main things to note are that you should use single key and macros from the middle section. You don't want to use "software macros", unless you just really want to install the macro software from CHERRY on every computer you use it on. Keyboard macros work just fine for everything, and are plug-and-play for any device that takes a USB keyboard.
The only other "problem" I found when I used it for the first time today (Socks in the Frying Pan doesn't tour with a LD, so we got to have fun) was that the "TIME" and "DATA" keys (the ones under the page arrows) don't allow you to hold them down to use them. Normally you could hold them to view the information they reveal, but the only way to do this on this keyboard is a double-tap. This simply locks them on, and another tap releases the lock. Small, but not technically 100% functionality. Aside from that, I had no issues.